
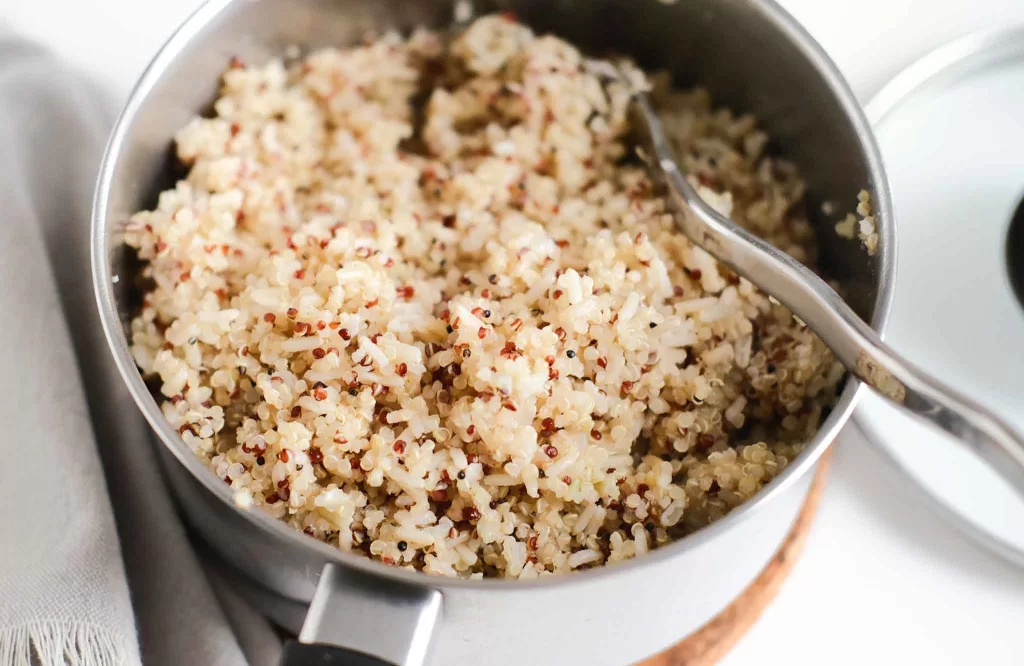
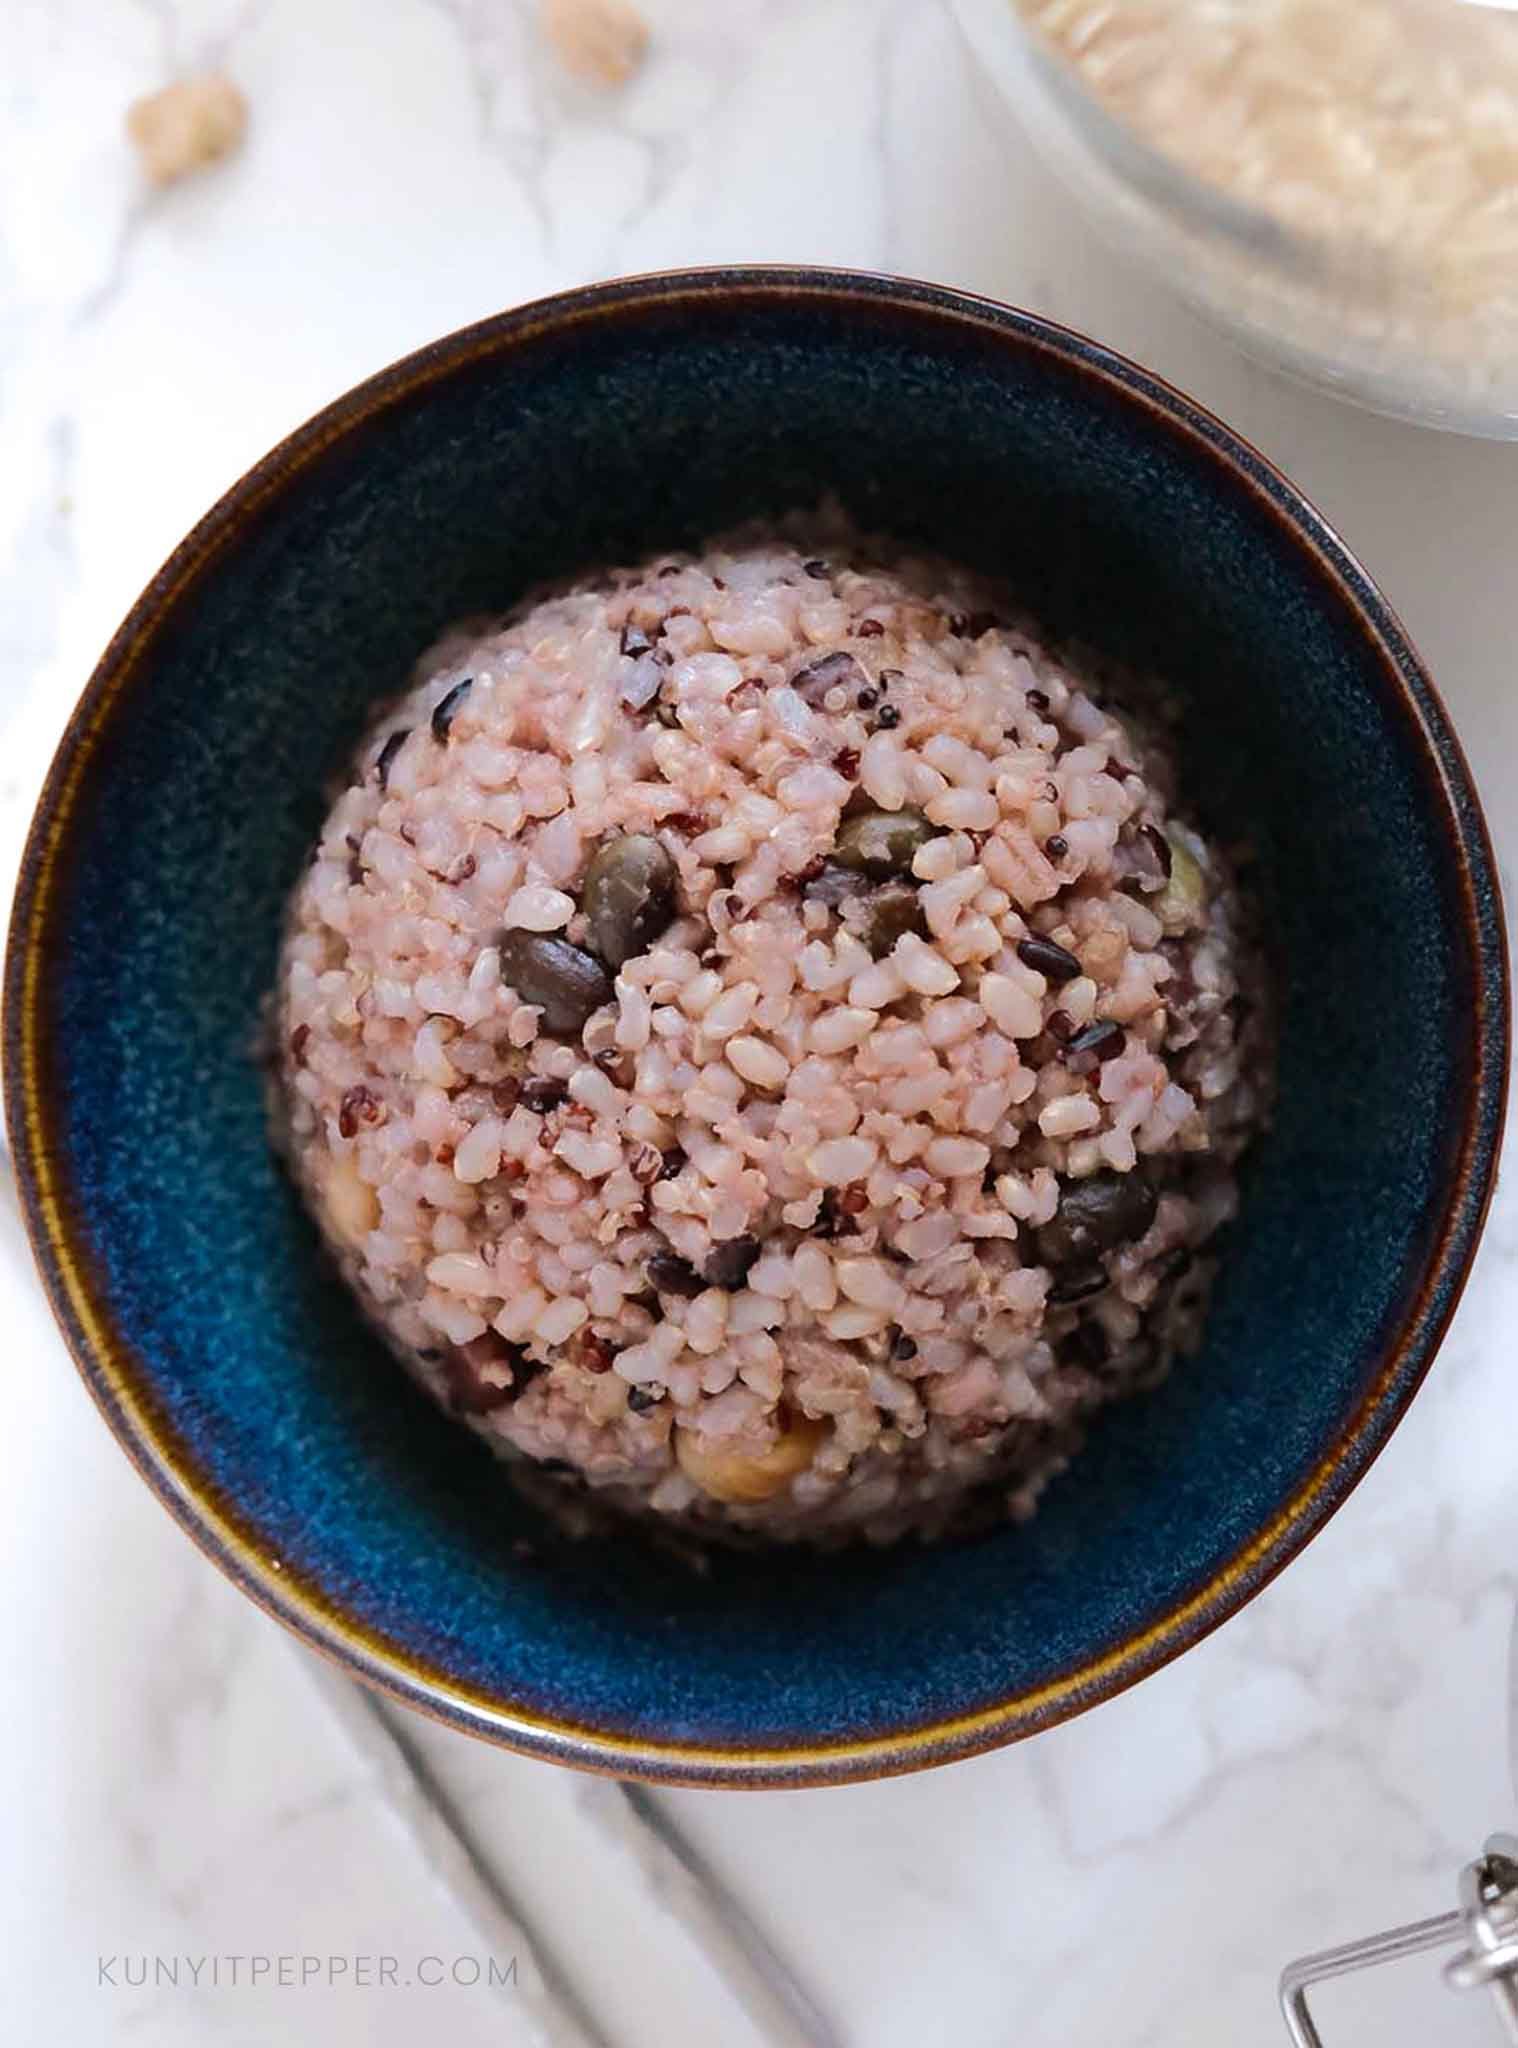
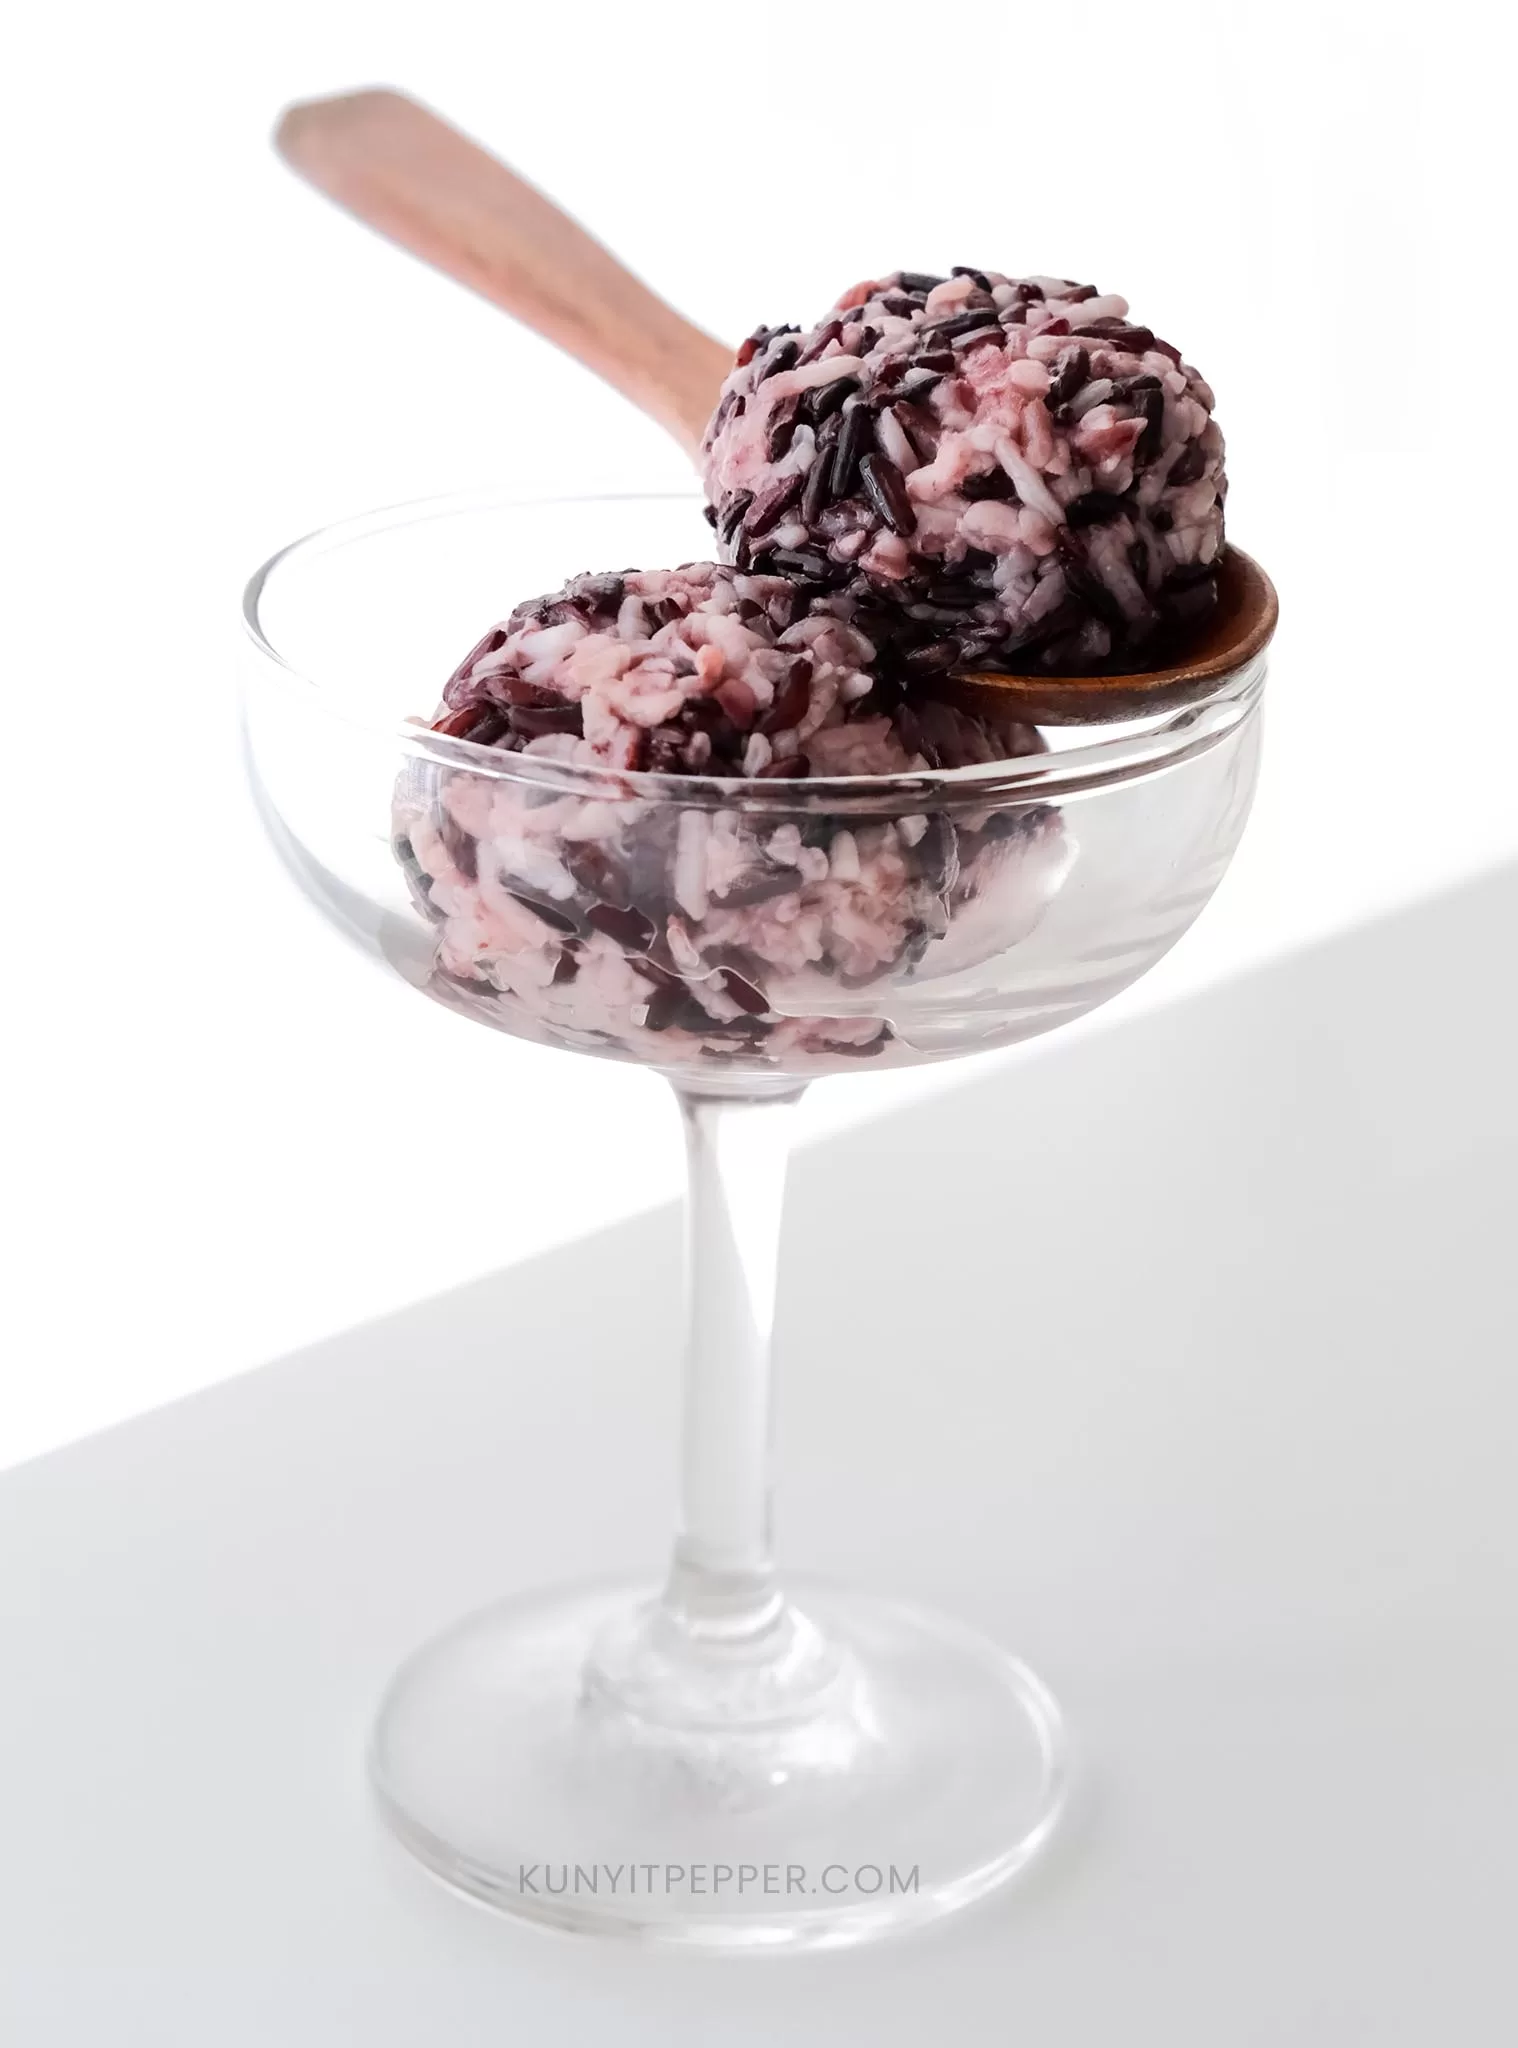
Cooking brown rice and quinoa together makes a wholesome swap for white rice, especially if you’re like me, who eats rice every day. This wholegrain combo is an effortless way to increase the nutritional value of your everyday bowl of rice.
Brown rice and quinoa contain protein, fiber, and antioxidants compared to white rice. Even on days when I’m low on ingredients, having brown rice and quinoa as a carb helps me get the nutrients I need.
About this brown rice and quinoa
This brown rice and quinoa recipe is simple with minimal ingredients. It’s a rice side dish, rather than a meal itself, to enjoy alongside any main course and side dishes.
Perfect if you’re looking for a versatile carb made of wholegrain that is gluten-free and offers some nutritional value to complete your meal.
Sometimes I make it in bulk. Having frozen brown rice and quinoa ready gives me space to focus on other dishes. I mentioned some prepping and reheating hacks below.
Table of Contents
- About this brown rice and quinoa
- Benefits of brown rice and quinoa
- Ingredients to make brown rice and quinoa
- How to make brown rice and quinoa taste better. Flavouring options
- Cooking brown rice and quinoa on a stovetop
- Instructions on how to cook brown rice and quinoa on a stovetop
- Cooking brown rice and quinoa in a rice cooker
- Step-by-step guide to cooking brown rice and quinoa in a rice cooker
- Cook brown rice and quinoa in the Instant Pot
- Instructions on how to cook brown rice and quinoa with the Instant Pot
- Comparison
- Prep them ahead! How to freeze quinoa and brown rice.
- Reheating brown rice and quinoa in the microwave
- Frequently asked questions
- What can you pair with brown rice and quinoa?
You will find 3 simple ways to cook brown rice and quinoa together. Feel free to skip to each cooking method: Rice Cooker, Instant Pot, Stovetop.
Speaking from experience, each cooking method differs slightly in terms of time, water ratio, and preparation. I’ve also mentioned the pros and cons of each one so you can pick what works best for you.
Benefits of brown rice and quinoa
- Low GI – Thanks to their fiber and protein content, both brown rice and quinoa are low-glycemic grains. That means they digest slowly and cause less of a sugar spike compared to white rice.
- Rich in antioxidants– Both brown rice and quinoa contain antioxidants (thanks to their flavonoid and phenolic compounds).
- Nutritious gluten-free carbohydrate combo. Brown rice contains fiber, and quinoa is rich in protein:
A bowl of cooked brown rice and quinoa also contains minerals and vitamins:
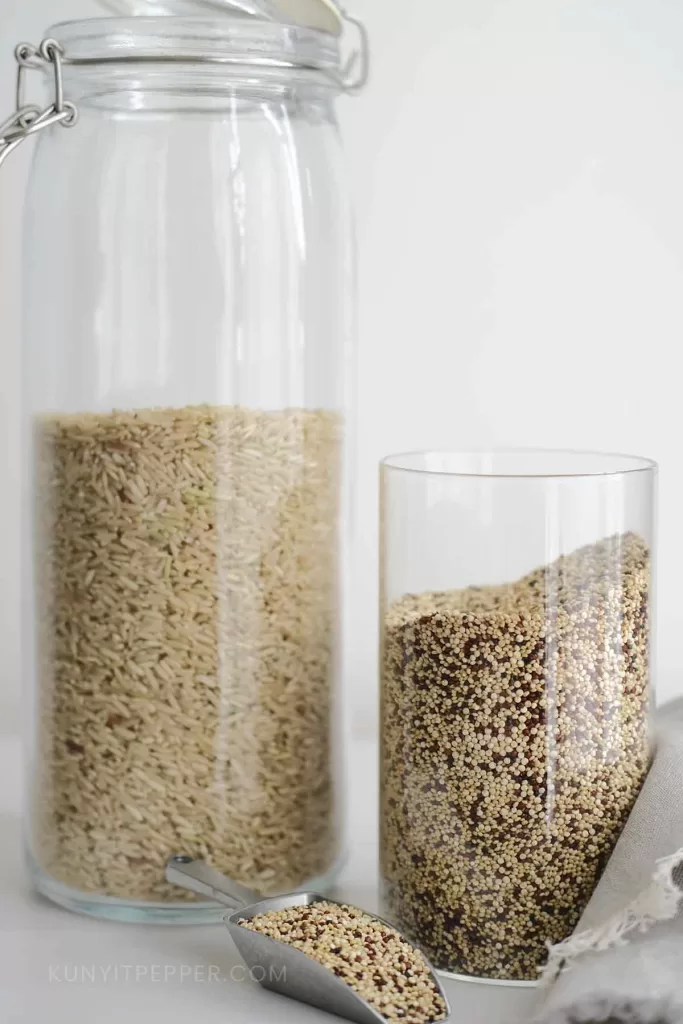
Ingredients to make brown rice and quinoa
- Brown rice—I use medium-grain brown rice. It’s widely available, less sticky compared to the short-grain version.
- Quinoa—I prefer to use tricolor quinoa (a mixture of red, white, and black quinoa) to maximize the variety of colors for its antioxidant benefits. Feel free to use white quinoa if that’s what you like more.
- Salt—Use sea, Himalayan, or kosher salt. Avoid table salt as it can make it overly salty.
- Water
I usually keep my carbs simple and plain since they’re a side dish, but feel free to play around with the flavor add-ins below.
How to make brown rice and quinoa taste better. Flavouring options
ADD LIQUID BROTH
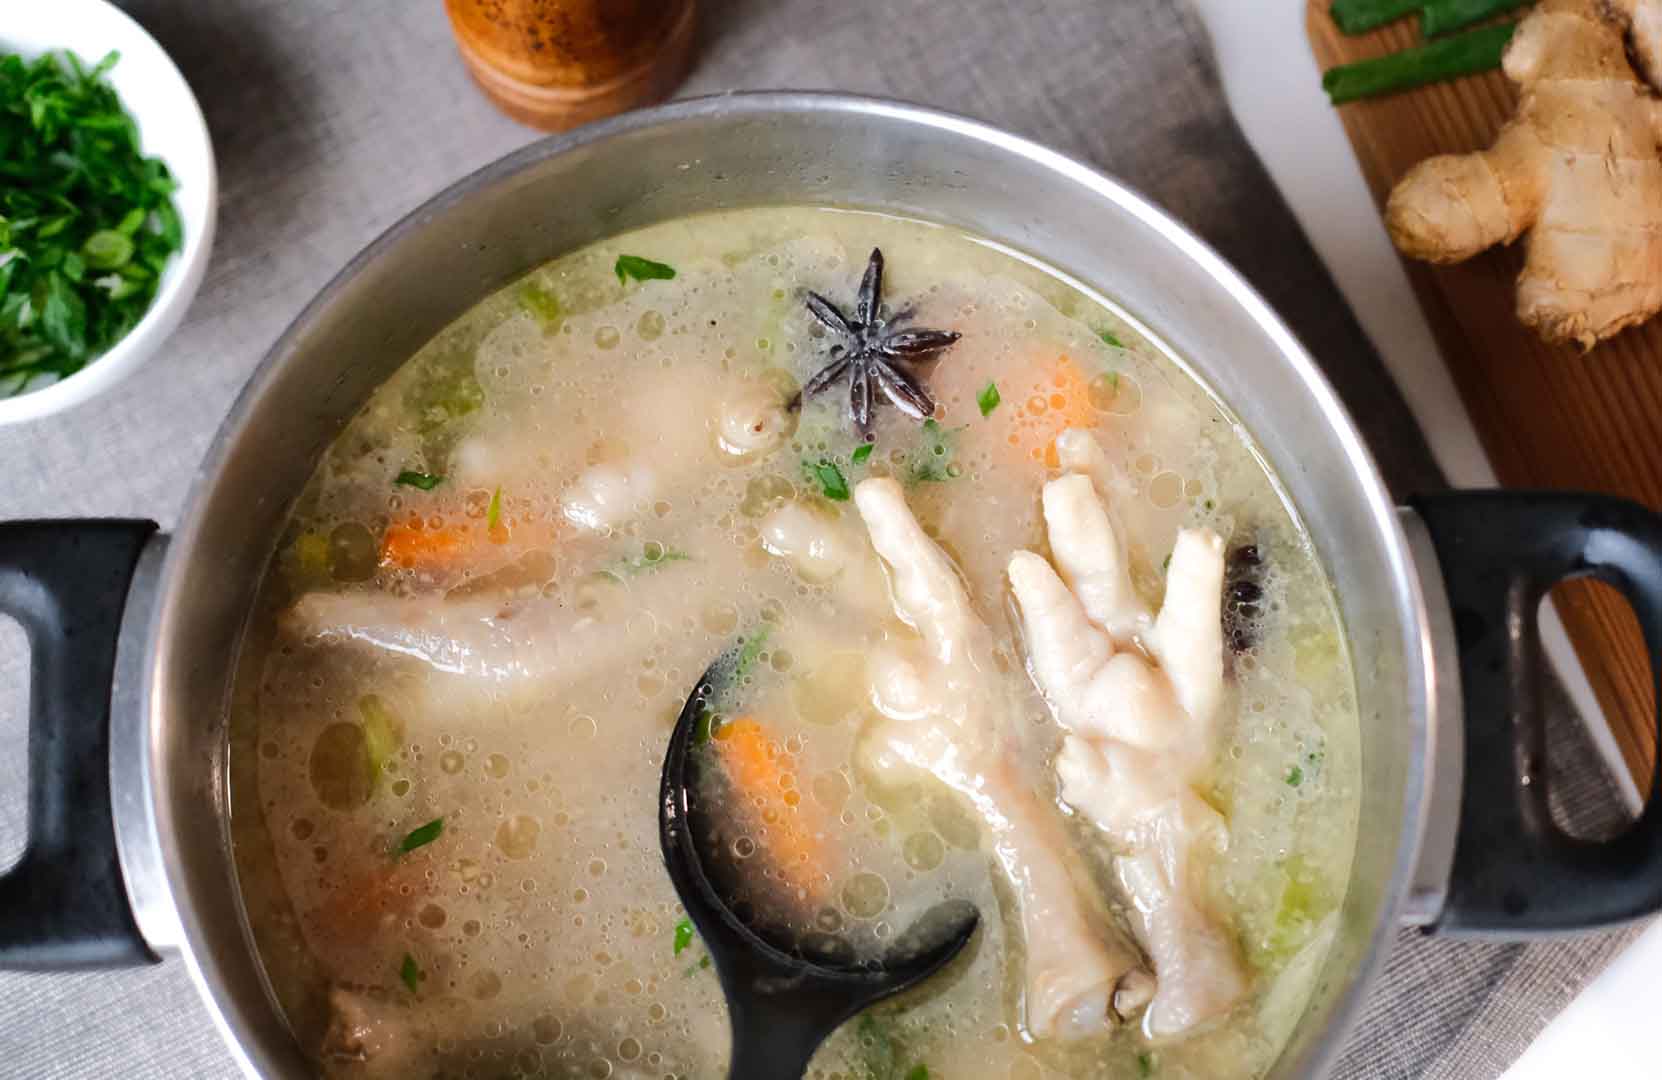
- Chicken broth, vegetable broth, or bone broth—Flavor it up by replacing water with broth to get a richer taste. If you’re not sure, start by replacing half of the water with broth and see if you like the taste. I’d opt for as natural as possible and low-sodium so I can control the salt better.
ADD SOME FAT
- Butter—Just like making pilaf, adding a tbsp of pure butter (or vegan butter) makes it more tasty.
- Coconut milk—If you prefer a creamier texture, like the Asian style, replace half of the water with coconut milk. For inspiration, check out my Aromatic Indonesian turmeric rice with coconut milk.
ADD A TOUCH OF HERBS
- Garlic—I sometimes add 2 cloves of finely grated garlic to make it more aromatic. Add them to the mix and give a little stir before turning the heat on.
- Herbs—Sprinkle a tablespoon of mixed dried or fresh Italian herbs (oregano, basil, marjoram, parsley) for a touch of Mediterranean flavor.
Cooking brown rice and quinoa on a stovetop
Tools & equipment: Medium-sized pot with a lid. Go for stainless steel or non-stick.
Total time: 45 minutes
Ingredients ratio: 1:1:3
⦿ 1 cup of brown rice
⦿ 1 cup of tri-color quinoa
⦿ 3 cups of water
Instructions on how to cook brown rice and quinoa on a stovetop
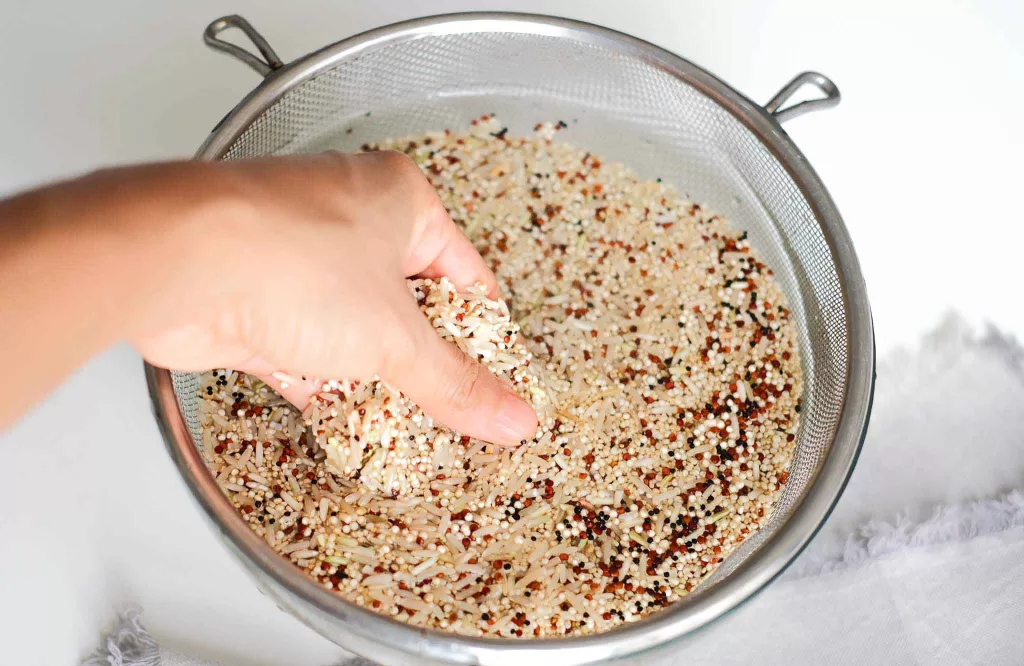
- Rinse the grains. Combine brown rice and quinoa in a fine mesh strainer. Gently rub the grains to remove the excess starch and dust, and rinse them until the water runs clear.

- Assemble. Transfer the washed brown rice and quinoa to a saucepan/pot and add water (following the ratio above). You can add your choice of flavoring ingredients.
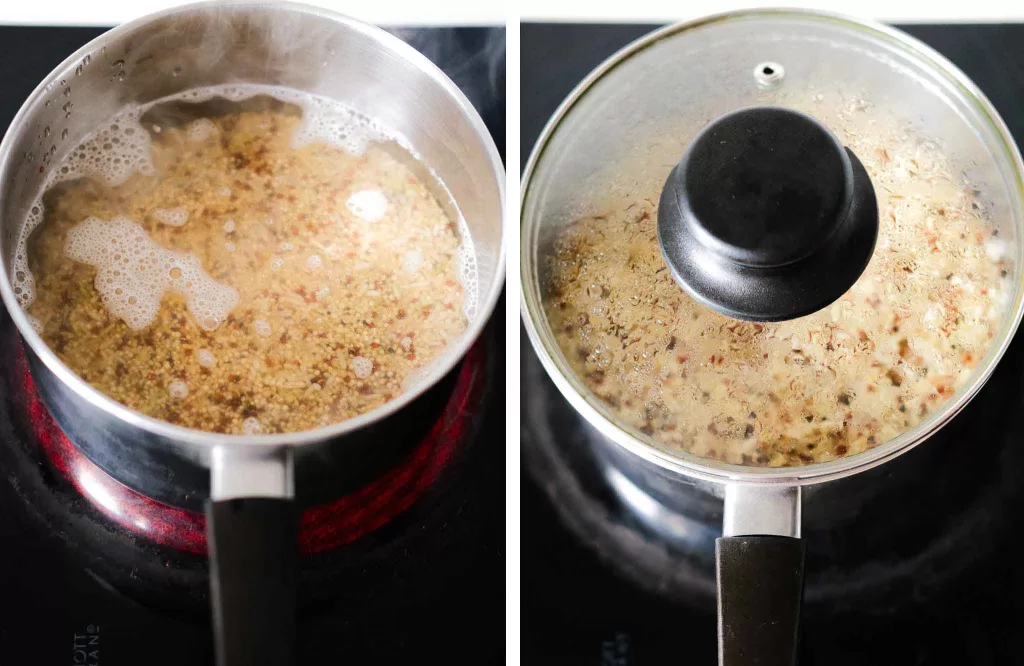
- Simmer. Bring them to a boil over high heat. Once boiling, reduce the heat to low, cover with a lid, and let it cook for 30 minutes or until the water is fully absorbed. You don’t need to stir while cooking.
- Rest. Remove the pan from the heat and let it rest with the lid on for about 3 minutes.
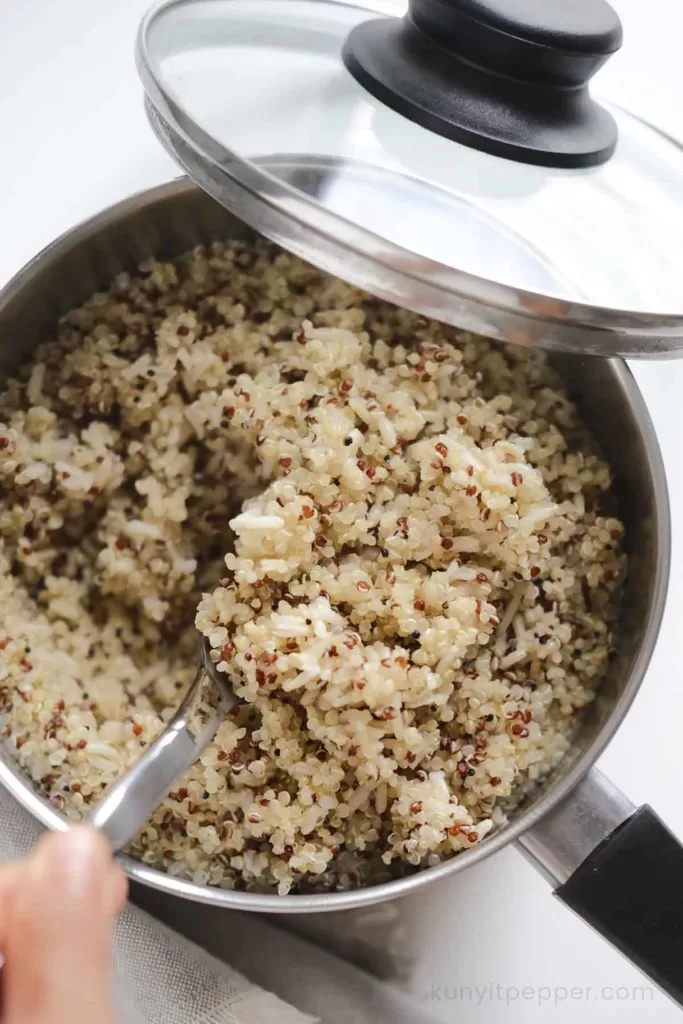
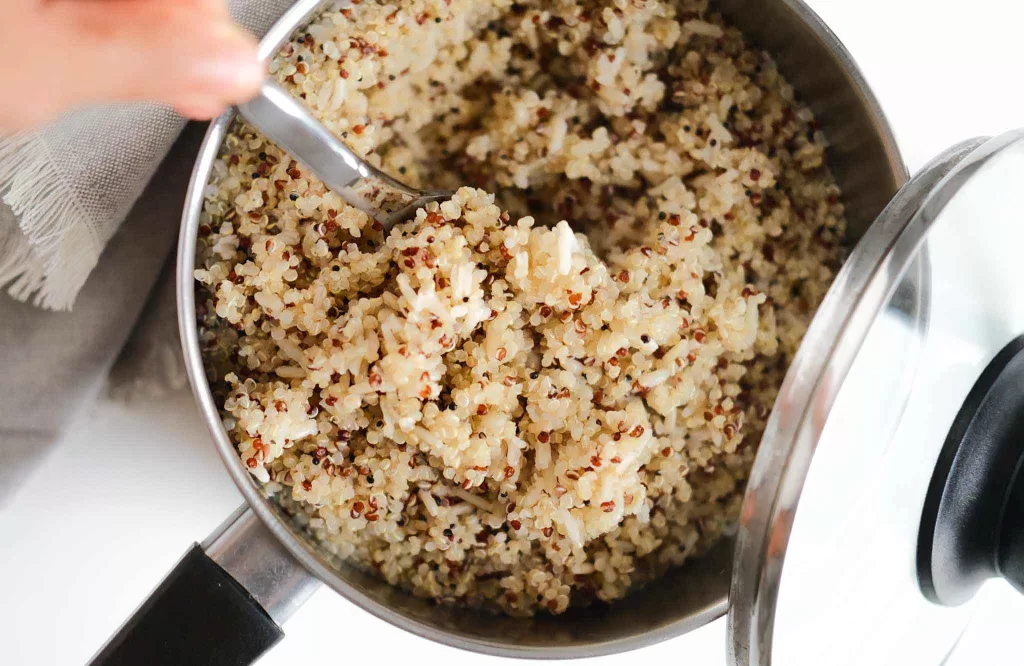
- Fluff and serve. Fluff the cooked grains with a fork, and it’s ready to serve!
Pros
- Requires only basic kitchen tools (stovetop and pan).
- Free to make any amount of rice, depending on the size of your pan.
Cons
- Need to set the timer manually.
- Cooking time may vary depending on the stovetop/induction.
- There is a possibility of burning if the heat is not set correctly.
Cooking brown rice and quinoa in a rice cooker
Equipment: Works for both normal rice cooker and multifunction rice cooker. I use a multi-function rice cooker with a brown rice setting. The closest model to mine is this Zojirushi Rice Cooker.
Total time: 63 minutes
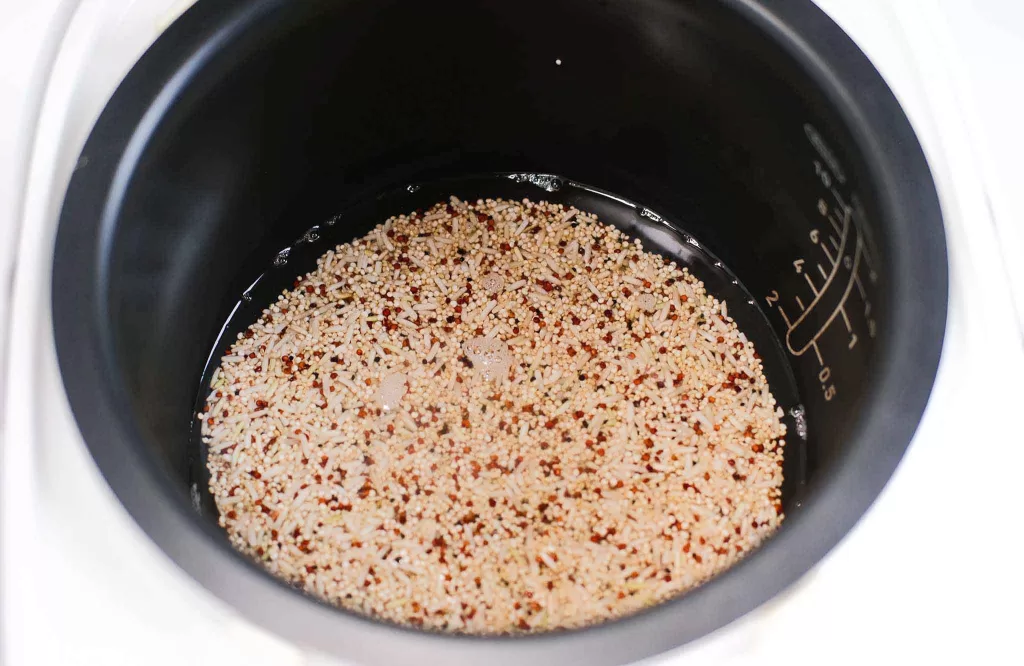
Ingredients ratio: 1:1:2.5
⦿ 1 cup of brown rice
⦿ 1 cup of tri-color quinoa
⦿ 2 and 1/2 cups of water
Step-by-step guide to cooking brown rice and quinoa in a rice cooker
- Rinse. Combine brown rice and quinoa in a fine mesh strainer and rinse them until the water runs clear. Gently rub the grains with your palm to remove excess starch and dust.
- Assemble. Transfer the strained brown rice and quinoa to a rice cooker pot and add water, and your choice of flavoring (if any).
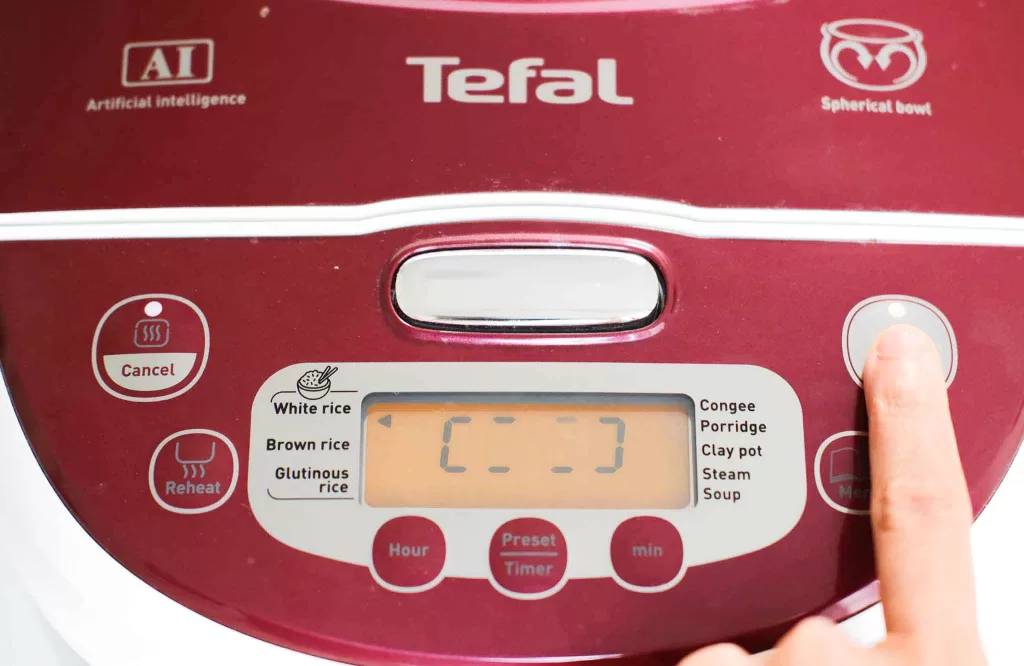
- Cook. Start the cooking according to your rice setting.
⦿ White Rice Setting: Select “white rice” setting, if using a basic white rice cooker. But consider soaking the brown rice for 30 minutes before cooking. Brown rice takes longer to cook compared to white rice. Pre-soaking it helps to reduce cooking time.
⦿ Brown Rice Setting: Select the “brown rice” setting if your rice cooker came with the function. It usually took me 1 hour.
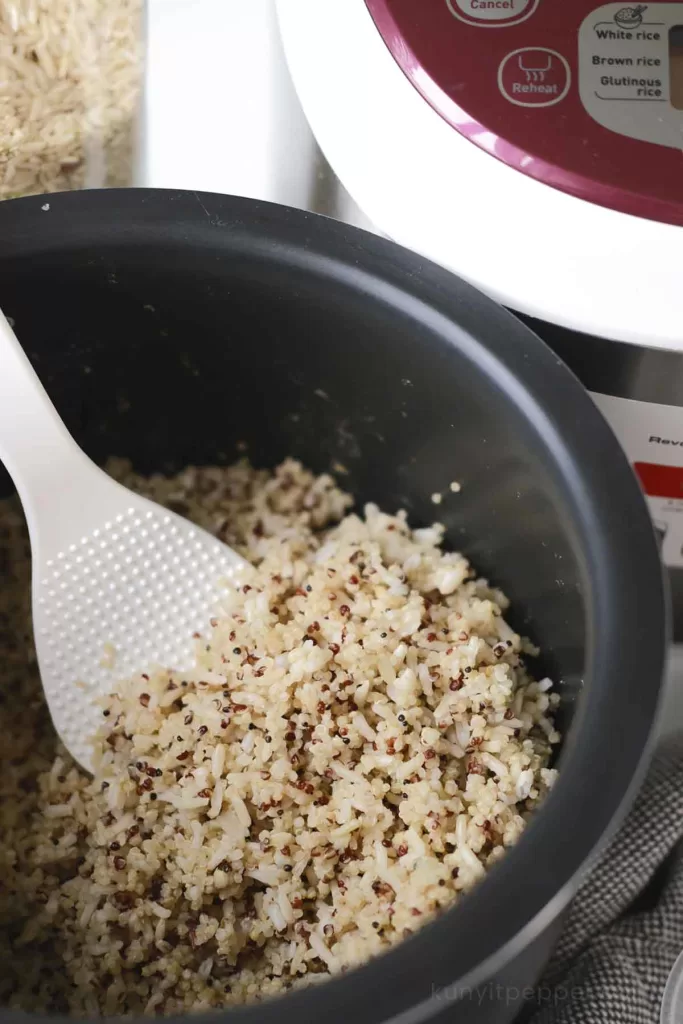
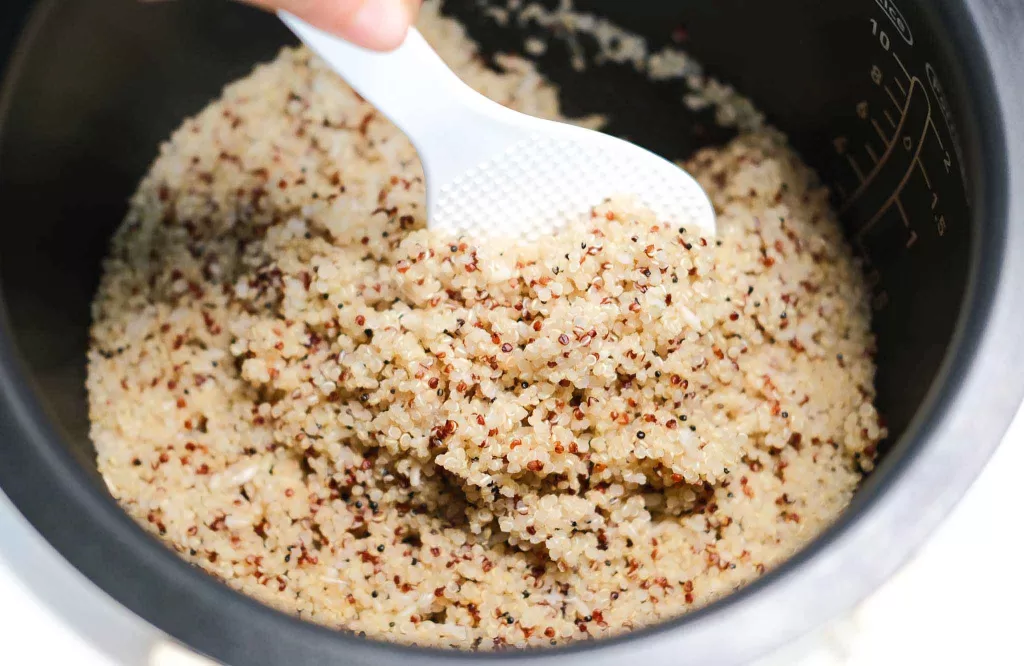
⦿ Manual Setting: If your rice cooker doesn’t have a brown rice setting but a manual setting, set the cooking timer for 50 minutes. - Fluff and serve: Once the timer is done, fluff them with a rice scoop, and it’s ready to serve!
Pros
- Convenient to cook, you just need to set it and leave it. Even if it stays longer in a rice cooker, it won’t overcook.
Cons
- It takes longer to cook compared to other methods.
- If you don’t have a brown rice setting or manual setting, pre-soaking the brown rice is necessary.
Cook brown rice and quinoa in the Instant Pot
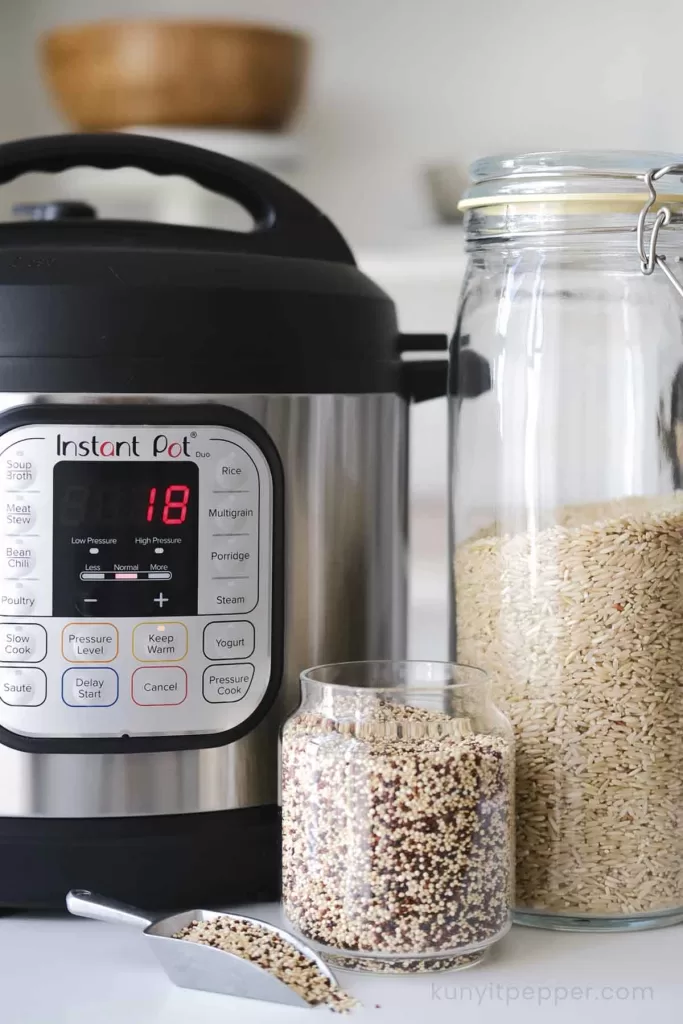
Equipment: Instant Pot – I use Instant Pot Duo 7-in-1 Multi-Use Pressure Cooker
Total time: 40 minutes
Ingredients ratio: 1:1:2.25
⦿ 1 cup of brown rice
⦿ 1 cup of tri-color quinoa
⦿ 2 and 1/4 cups of water
Instructions on how to cook brown rice and quinoa with the Instant Pot
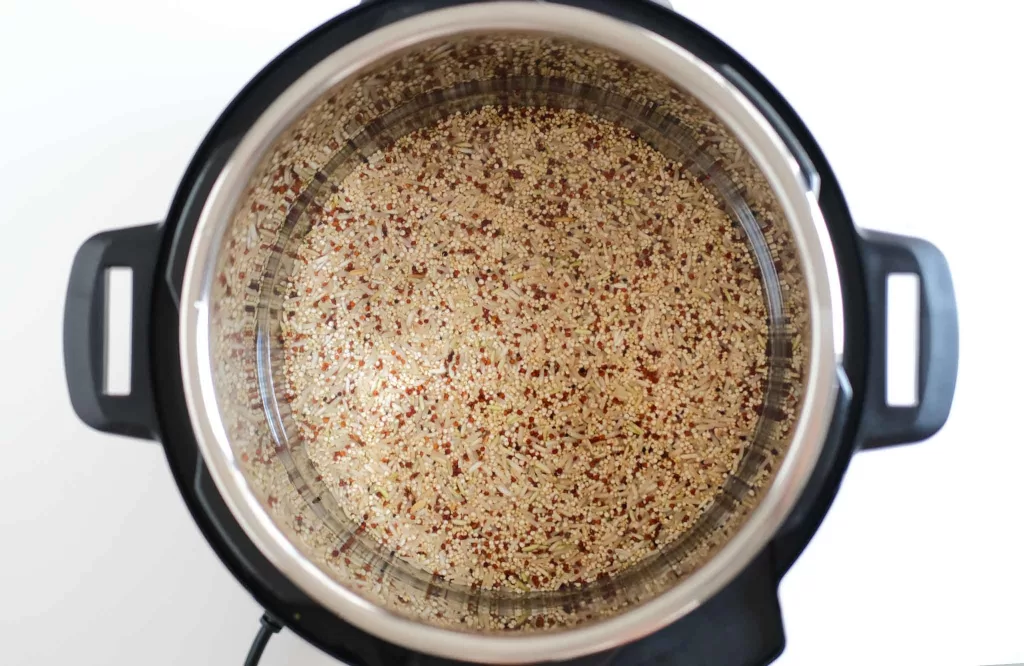
- Rinse. Rinse the brown rice and quinoa over a fine-mesh strainer until the water runs clear.
- Assemble. Combine brown rice and quinoa in the Instant Pot, add water, salt, and flavoring ingredients (if any).
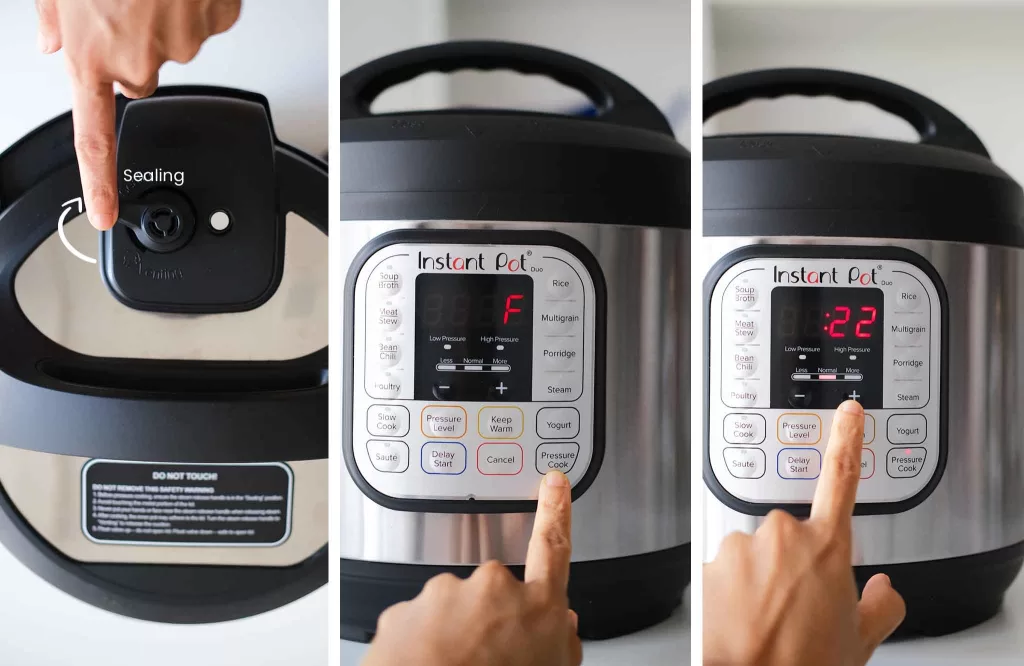
- Cook. Seal the lid, press the ‘Pressure cook’, set it on ‘High‘, and adjust the timer (+) to 22 minutes.
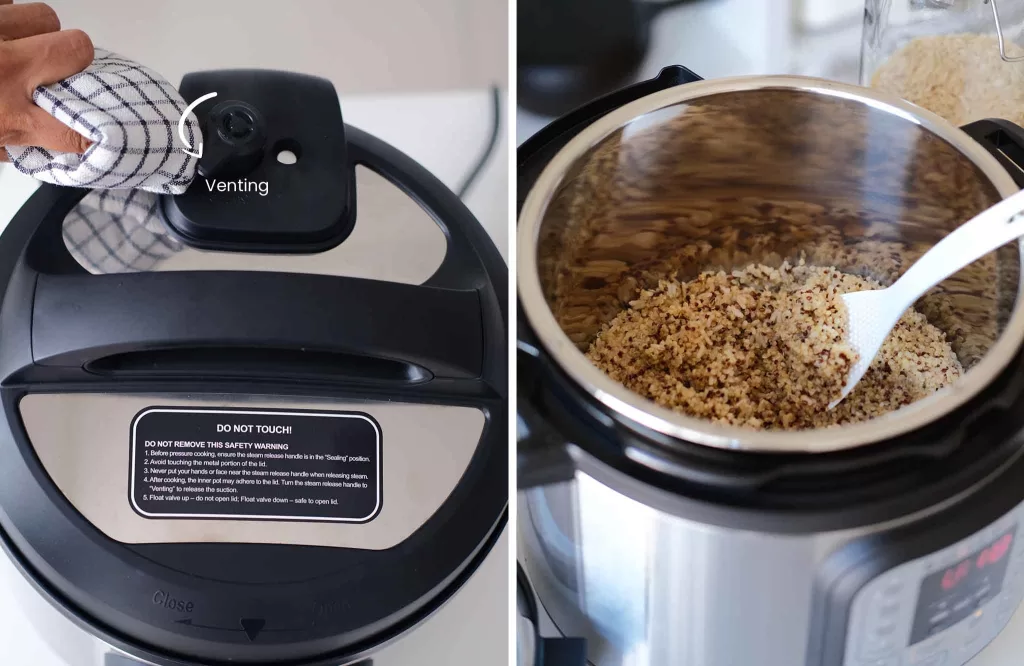
- Rest. Once the cooking time is complete, let it rest for 10 minutes. Once the timer shows (L0.10), with an oven mitt or cloth, carefully release the pressure by turning the valve to venting.
- Fluff and serve. When the steam stops (open the pot and fluff the cooked brown rice and quinoa with a fork or spatula. It’s ready to serve!
Pros – Cooks faster than other methods and no soaking required
Cons – Requires understanding of handling a pressure cooker.
Comparison
While the total cooking time and water ratio slightly differ, they all result in perfectly fluffy grains. Since a multifunction rice cooker is my main equipment for cooking grains and legumes, it’s always been my go-to method when making brown rice and quinoa– it’s the ultimate set-it-and-forget-it method!
But, the best method is the one that fits your lifestyle and kitchen tools. To summarize these 3 methods.
| Methods | Grains | Water | Total Time | Pros |
| Stovetop | 1 cup of quinoa 1 cup of brown rice | 3 cups | 45 minutes | Convenient |
| Rice cooker | 1 cup of quinoa 1 cup of brown rice | 2 and 1/2 | 65 minutes | Easiest |
| Instant pot | 1 cup of quinoa 1 cup of brown rice | 2 and 1/4 | 40 minutes | Fastest |
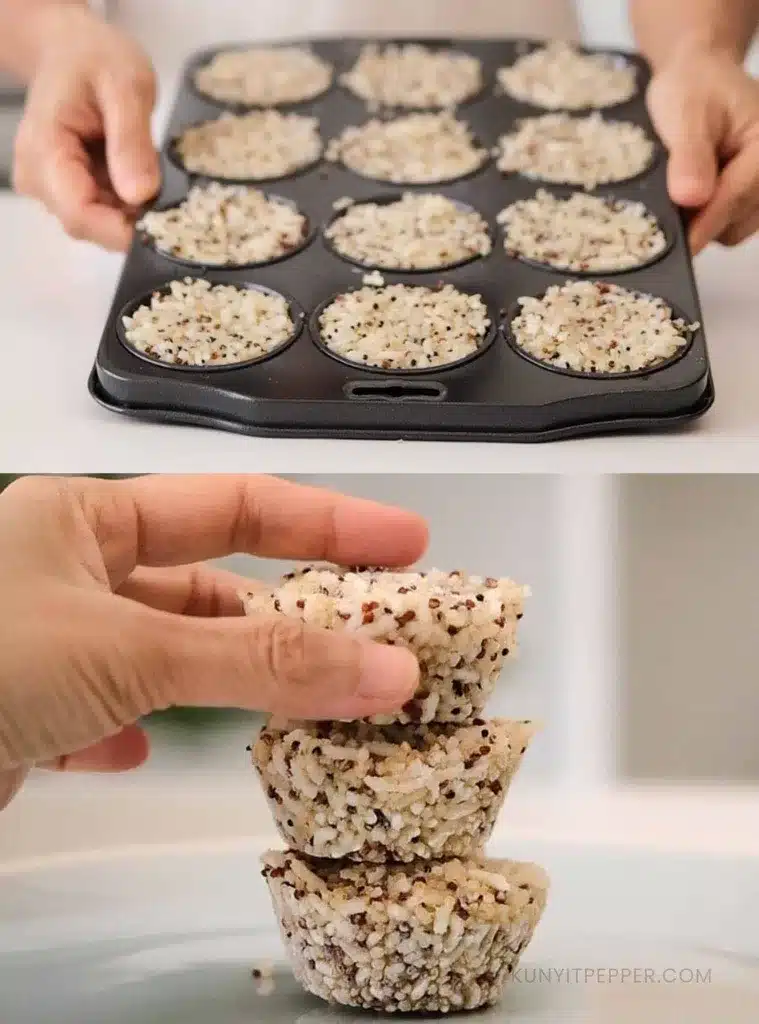
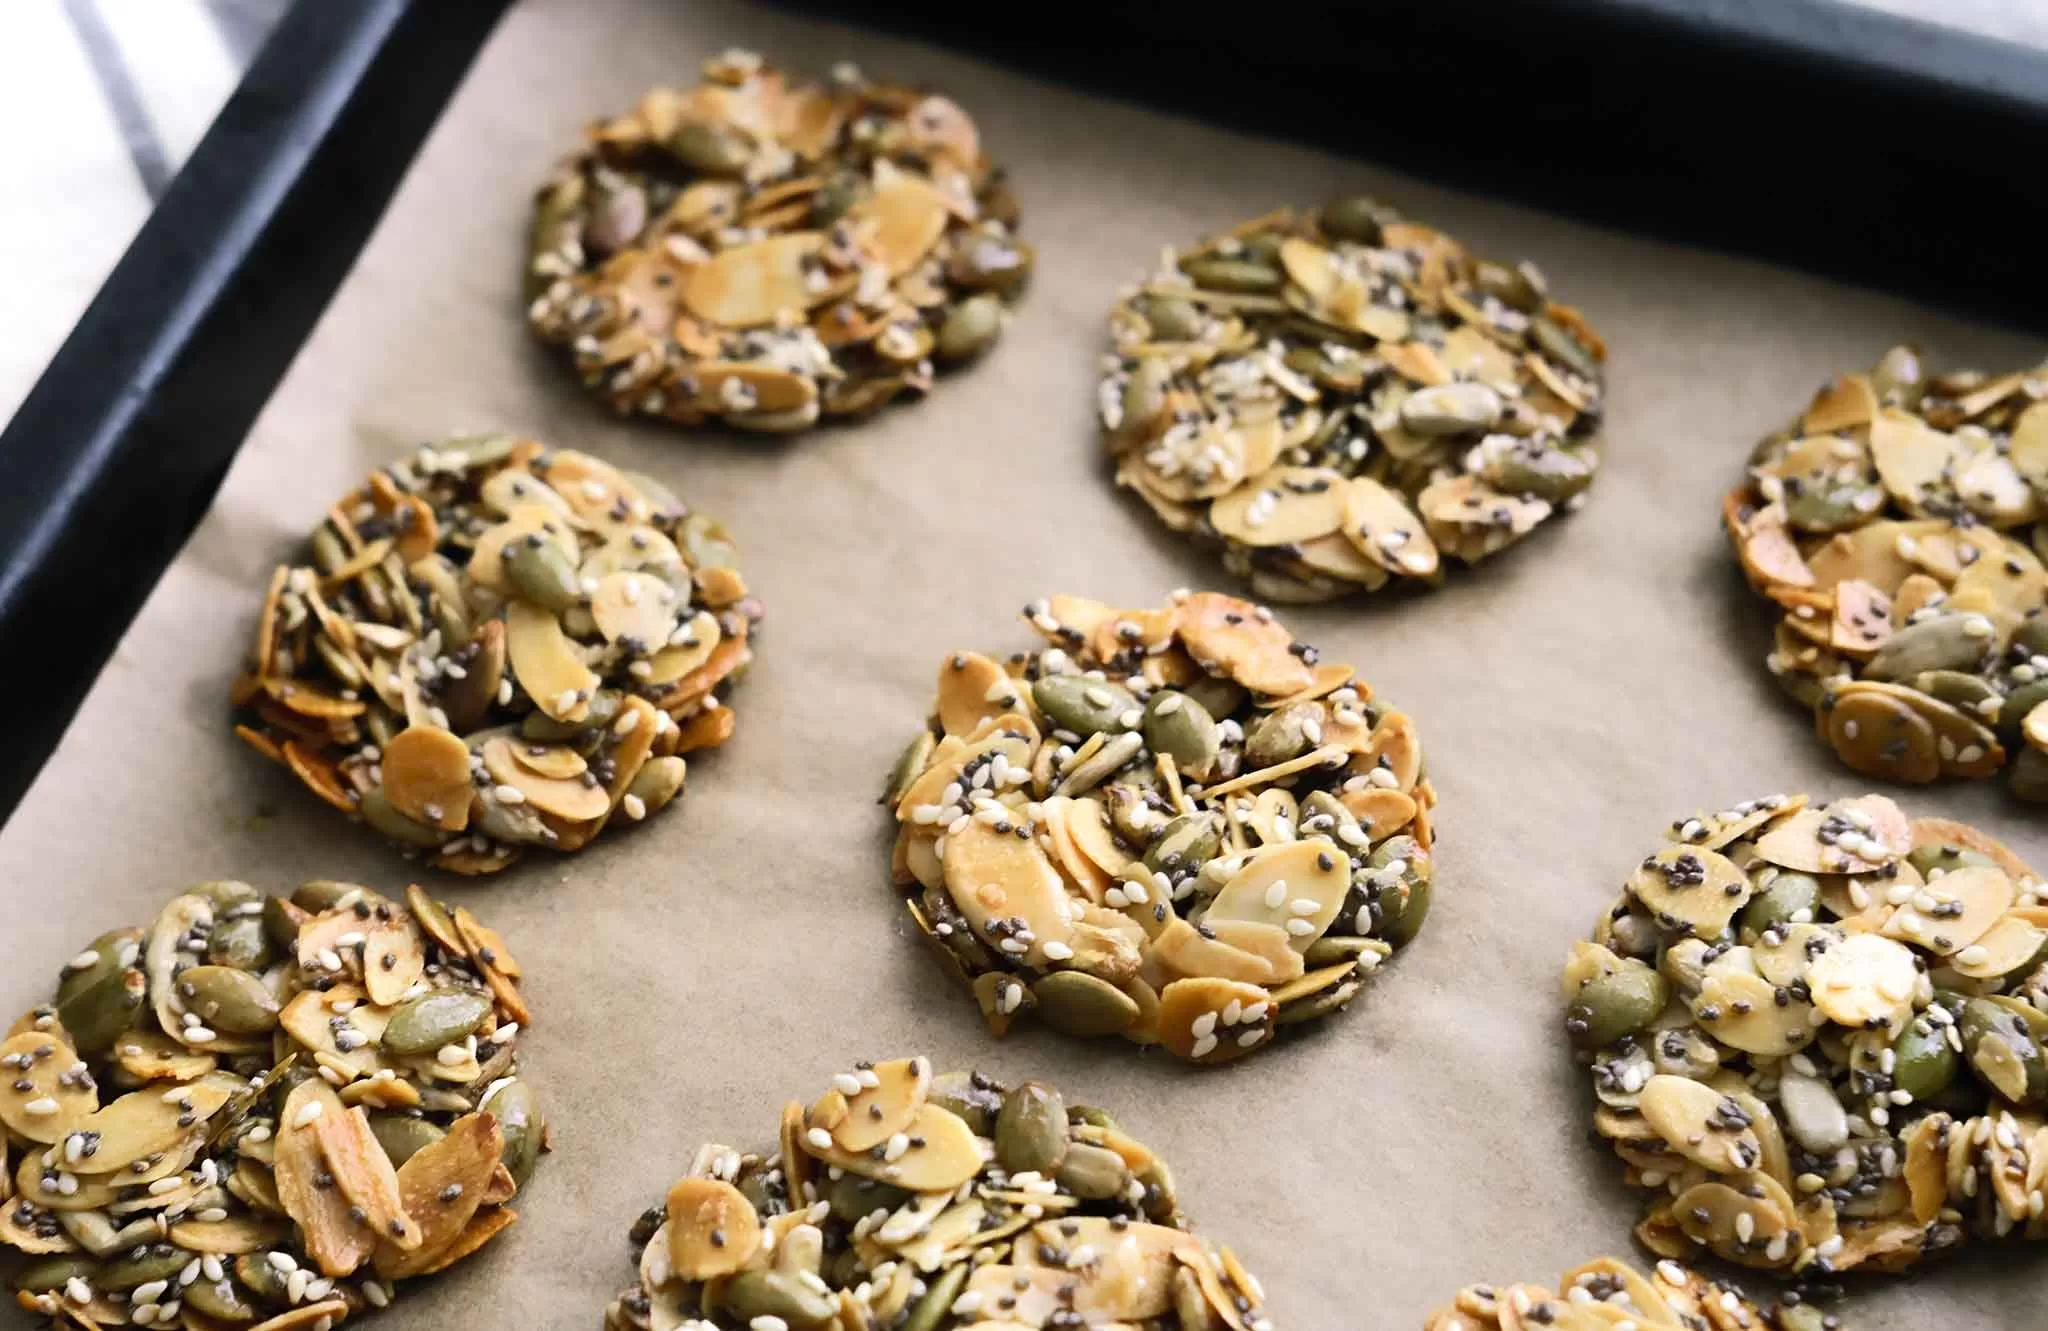
Prep them ahead! How to freeze quinoa and brown rice.
I suggest portioning the cooked quinoa and brown rice into small containers for easy reheating. You can also use a muffin pan like I do below.
Scoop the grains into a muffin pan, press them tightly, and transfer them to the freezer. And once they are frozen, transfer them to a big container or ziplock bag.
Reheating brown rice and quinoa in the microwave
Place the brown rice and quinoa in a dish, then place a small bowl of water next to it. Reheat for 2–3 minutes or until warm enough. Voila!
Frequently asked questions
Is it necessary to wash the rice before cooking?
Yes, it is necessary to wash the rice before cooking. It not only removes the excess starch but also cleans them from dust, bugs, and chemical residue during the processing.
Is it necessary to wash the quinoa before cooking?
Washing quinoa before cooking not only helps remove potential dust and debris but also reduces its bitter taste, especially in colored quinoa.
Should I soak brown rice before cooking?
It is a personal preference to soak the brown rice before cooking. Brown rice is a whole grain that requires more water and a longer cooking time.
Pre-soaking gives brown rice time to absorb water, reducing cooking time. For some, soaking brown rice helps to ease digestion. This is due to phytic acid in brown rice, which can cause reactions in some people, such as bloating. If soaking brown rice before cooking requires planning, it’s still okay to skip the soaking.
How long should brown rice and quinoa be kept in the fridge?
Store the cooked brown rice and quinoa in the refrigerator up to 4 days. For longer use, consider freezing them up to 2 months.
What is the best quinoa and brown rice water ratio?
The ideal quinoa and brown rice water ratio (grains:water) is 2:2.5 for a rice cooker, 2:3 for a stovetop, and 2:2.5 for an Instant Pot, given that you don’t soak them.
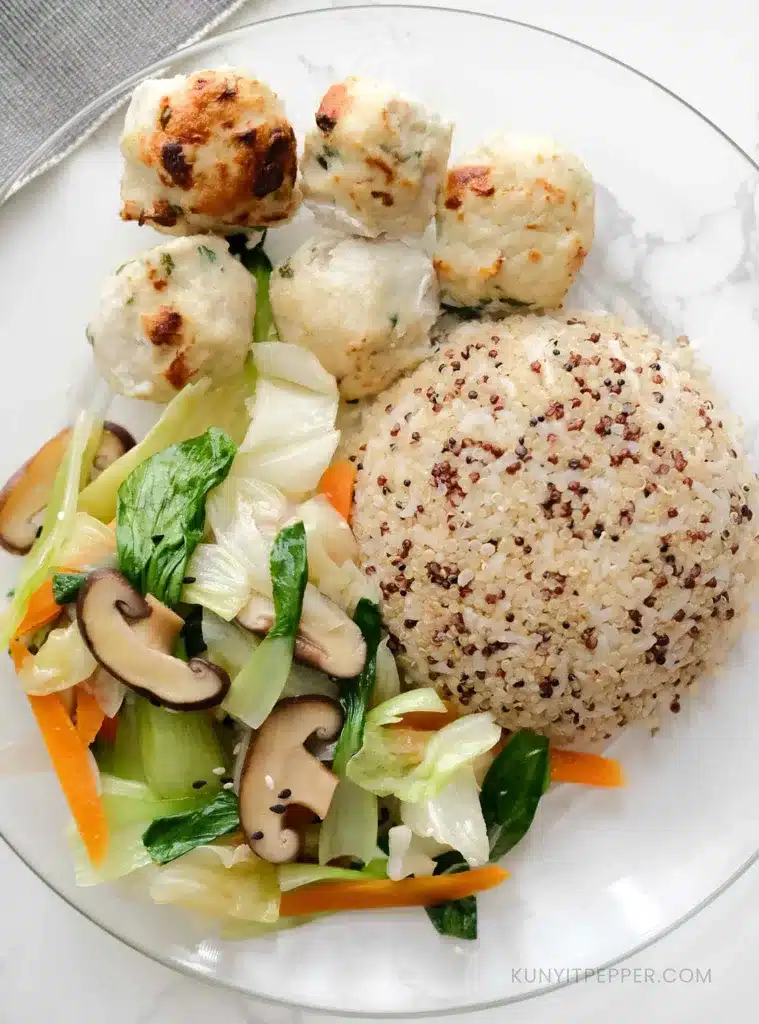
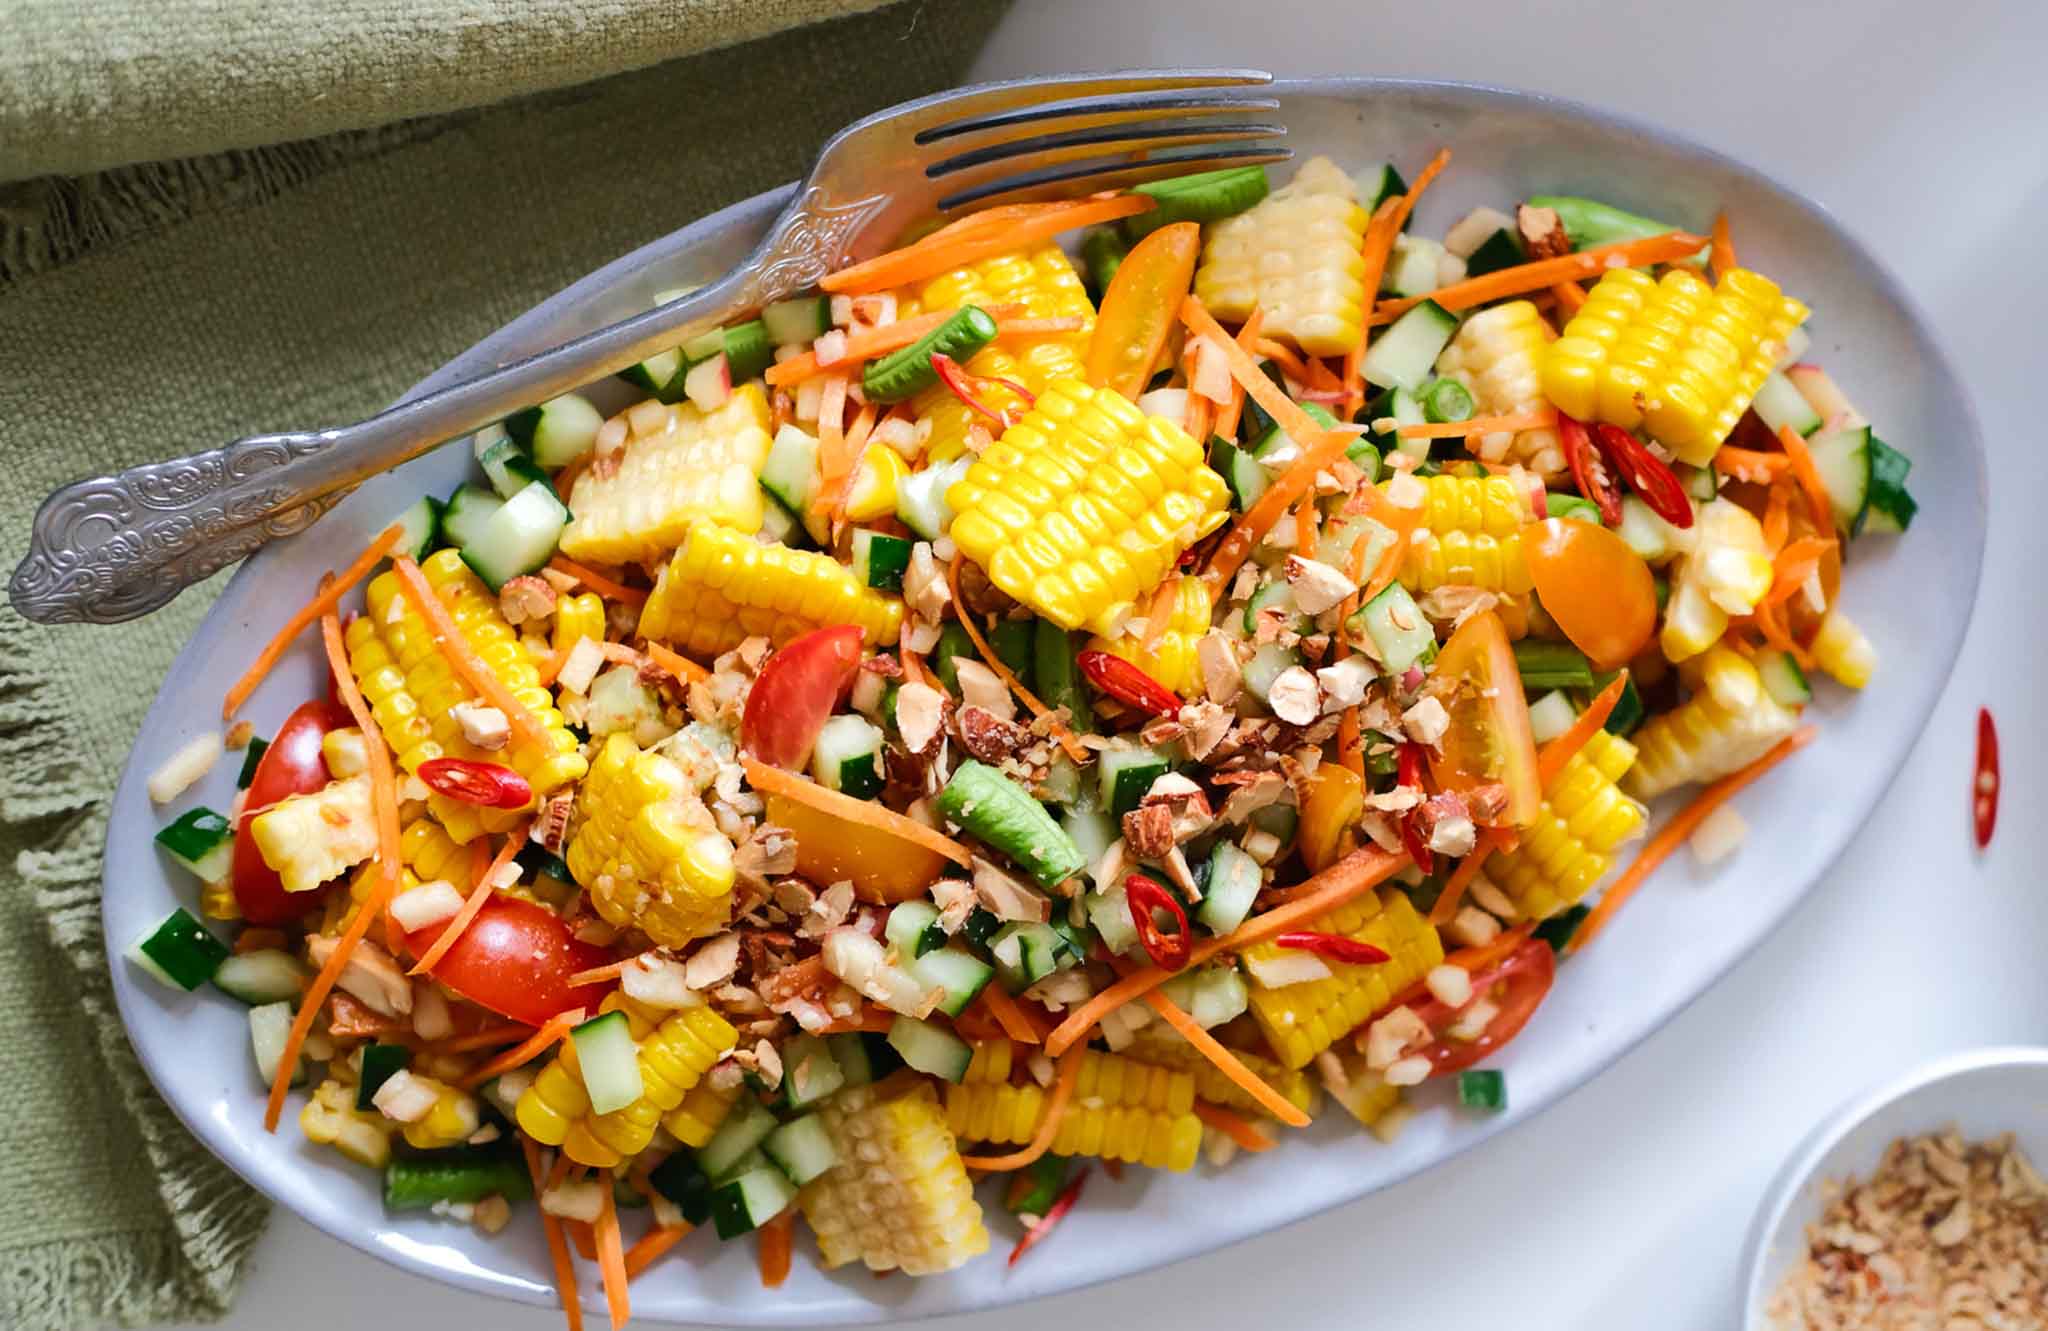
What can you pair with brown rice and quinoa?
There’s so much you can pair with these grains. I personally make brown rice and quinoa to replace white rice and enjoy it next to other side dishes with my main course or soups.
Simple chicken recipes to pair with

Other festive and cultural rice recipes to try
Other wholesome rice and whole grains recipes you might like

How To Cook Brown Rice and Quinoa – Stovetop, Rice Cooker and Instant Pot
4
servings220
kcal63
minutes45
minutes40
minutesThis brown rice and quinoa recipe is simple with minimal ingredients. It’s perfect if you’re looking for everyday healthy rice or an easy whole-grain recipe that is gluten-free and nutritious to enjoy alongside the main course and side dishes.
Ingredients
1 cup Medium-grain brown rice
1 cup Tricolor quinoa
1/2 tsp Salt
Water
(Stovetop-3cups)
(Rice cooker-2.5cups)
(Instant Pot-2and 1/4 cups)Scroll above for additional flavoring option.
Directions
- Rinse the grains. Combine brown rice and quinoa in a fine mesh strainer. Gently rub the grains to remove the excess starch and dust, and rinse them until the water runs clear.
- Assemble. Transfer the washed brown rice and quinoa to the pot and add water (following the ratio above). At this point, you may add your choice of flavoring agents.
- Cook.
Stovetop: Bring them to a boil over high heat. Once boiling, reduce the heat to low, close the lid, and let it simmer for 30 minutes or until the water is fully absorbed. You don’t need to stir while cooking. Refer to the step-by-step visuals above in the stovetop method section.
Rice Cooker: Place the rice cooker pot into its host and close the lid.
⦿ White Rice Setting: If your rice cooker only has a “white rice” setting, consider pre-soaking the brown rice and quinoa for 30 minutes before cooking on the white rice setting.
⦿ Brown Rice Setting: If your rice cooker has a “brown rice” setting, select the button and let it start cooking. It usually took me 1 hour.
⦿ Manual Setting: If your rice cooker doesn’t have a brown rice setting but a manual setting, set the cooking timer for 50 minutes. Refer to the step-by-step visuals above in the ‘Rice Cooker Method’ section. Refer to the visual above.
Instant Pot: Seal the lid by turning the vent to the ‘sealing’ position. Press ‘Pressure cook’ button on ‘High’ and set the timer to 22 minutes by adjusting the ‘+’ button. The cooking will start a few seconds after the timer is set. Refer to the step-by-step visuals in the Instant Pot method section. - Fluff and serve!
Stovetop: Fluff the cooked grains with a fork, and it’s ready to serve!
Rice Cooker: Once the timer is done, fluff them with a rice scoop, and it’s ready to serve!
Instant Pot: When the steam stops (about 1-2 minutes, open the pot and fluff the cooked brown rice and quinoa with a fork or spatula. It’s ready to serve!
Equipment
- Zojirushi Rice CookerCheck on Amazon
- Instant PotCheck on Amazon
Recipe Video
Notes
- If you’re not planning to finish the brown rice and quinoa within 3 days, I recommend portioning and freezing them.
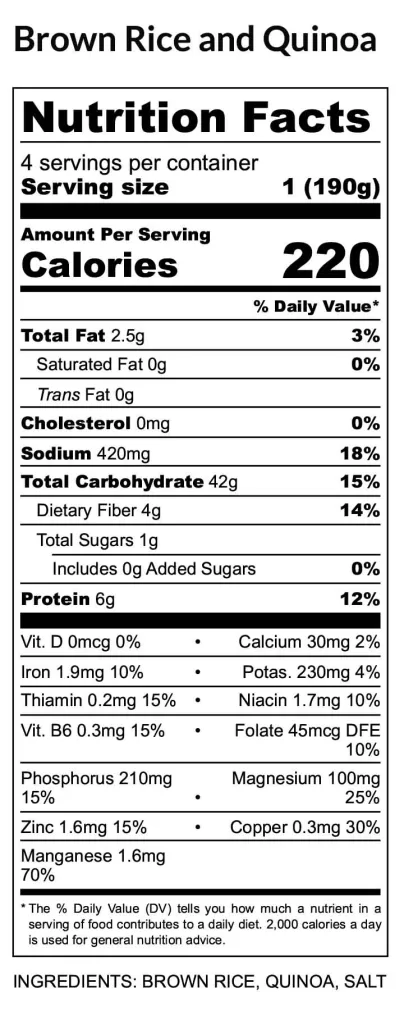
Nutrition Facts
- Serving Size: 190g
- Total number of serves: 4
- Calories: 220kcal
- Sodium: 420mg
- Potassium: 230mg
- Carbohydrates: 42g
- Fiber: 4g
- Sugar: 1g
- Protein: 6g
- Calcium: 30mg
- Iron: 1.9mg
- Thiamin: 0.2mg
- Niacin: 1.7mg
- Folate: 45mg
- Phosphorus: 210mg
- Magnesium: 100mg
- Zinc: 1.6mg
- Copper: 0.3mg
- Manganese: 1.6mg
🥣 Did you try this recipe? Let me know your thoughts in the comments below.


